Getting started
Find the name of your home directory
On windows:
start a cmd shell by typing “cmd” in the windows search bar and executing the dos command prompt
Note the location that is listed when you type
echo %userprofile%
in the command window
On macs:
Start a terminal by typing terminal in spotlight
Note the location that is listed when you type
echo $HOME
Install Miniconda Python version 3.6 from https://conda.io/miniconda.html into a a folder called mini36 in your home directory. When prompted, choose to install for just yourself, but make miniconda python the default python
To see if your installation is working, start a terminal and type
where python (on windows)
or
which python (on macs)
You should see that mini36 python is the version that is found on your path
Install the git version control package (which we will learn more about later). To do this, type
conda install git
at a prompt and answer yes to permit the install
Clone the course software into a directory of your choosing. Create a folder somewhere under your home directory and cd into that folder. Then type the following at the prompt:
git clone https://github.com/phaustin/numeric.git
cd into the numeric folder and install the course software by typing (note single minus sign in front of the e):
pip install -e .
cd into the numeric/utilities folder and install the required python packages by typing (note two minus signs in front of the file flag):
conda install –file class_specs.txt
If the packages have installed correctly then typing
jupyter notebook
at a prompt should launch jupyter.
Learning bash and git
- The default shell on OSX is bash, which is taught in this set of lessons: https://swcarpentry.github.io/shell-novice/
- if you are on Windows, you can get a bash shell by installing msys2
- A good place to go to learn git fundamentals is this lesson https://swcarpentry.github.io/git-novice/
Pulling changes from the github repository
When we commit changes to the master branch and push to our github repository, you’ll need to download those changes to keep current. To do that:
open a shell
cd to the numeric repository
fetch the changes with:
git fetch origin
make sure you aren’t going to clobber any of your own files:
git status
you can ignore “untracked files”, but pay attention to any files labeled “modified”. Those will be overwritten when you reset to our commit, so copy them to a new name or folder.
Finally, get to our commit with:
git reset --hard origin/master
If that worked, then printing the most recent log entry:
git log -1
should tell you the most recent commit message, and it should agree with what you see at our github repository.
Windows: Combining bash utilities with the Windows cmd shell
I set my windows laptop up so that commands like ls, pwd, cat, etc. work from the standard windows shell. To do this:
Install msys2 , which should create a new directory C:\msys64
Below I’m assuming that you have created a folder like: c:\Users\phil\bin to store your executable scripts. On my installation my user directory c:Usersphil is given by the %userprofile% environmental variable. To check what it is on your machine, open a cmd shell and do:
echo %userprofile%
Once you have created %userprofile%\bin, you need to add it to your %path% environmental variable so that folder will be searched for scripts. To do this, hit the windows key to get to the windows search bar and type:
edit environ
This should bring up a menu item that will take you to the control panel when you click it. The My control panel entry looks like this:
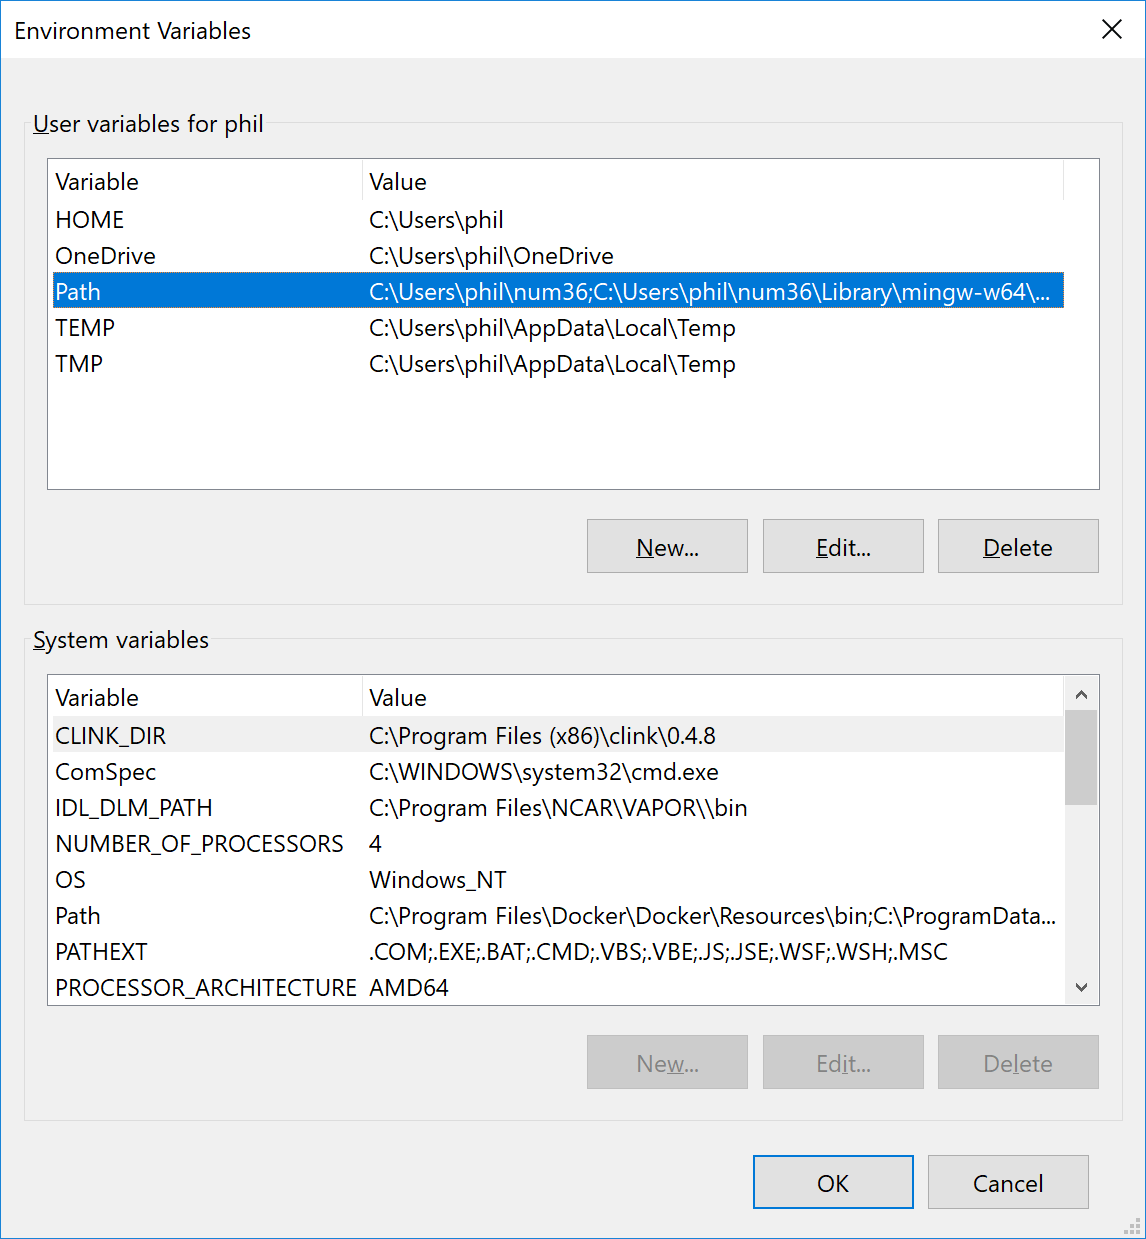
Double click on the path entry to get the list of folders currently in your path. My list looks like this (note I’ve install minconda python into a folder called num36)
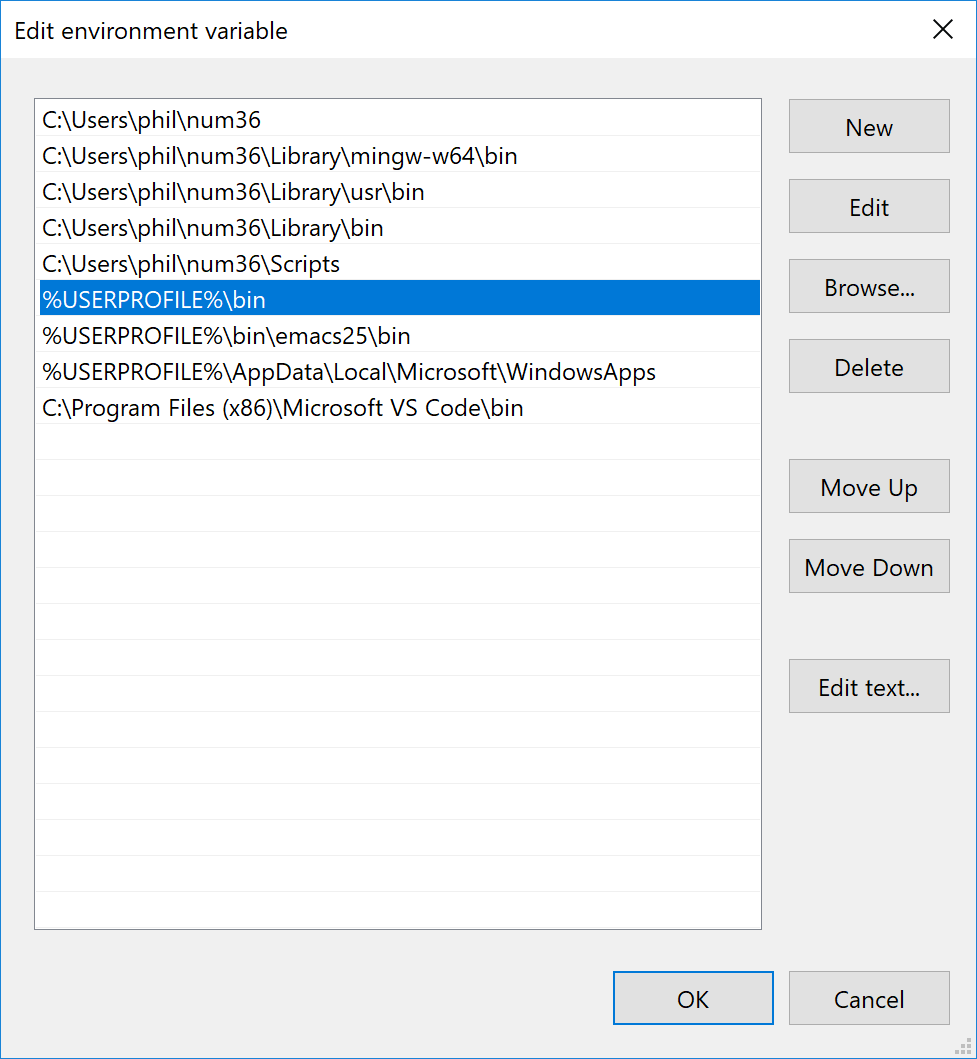
You want to add the new directory:
%userprofile%\bin
to this list like I did.
Copy two files from you numeric repository to %userprofile%\bin. The files are:
If the above is working, then going to the windows search bar and typing:
ncmdshould bring up a new console with working bash commands.
I also recommend installation of the clink utility to get command line editing and keyboard shortcuts.
Working with python modules
A good tutorial on python modules: https://www.tutorialspoint.com/python/python_modules.htm
Summary: python can import functions, classes, data structures from files that end in .py, as long is it can find them. A statement like:
from numpy import arange
tells python to look through the set of directories that are contained in set that are listed when you do:
import sys
print(sys.path)
When you import the arange from numpy, it opens the file numpy.py and reads in the function arange.
Similarly, if you have a file called mymodule.py than contains myfun, then, as long as it is in the directory that you are currently working in, python will find it and read in myfun. If you aren’t sure what directory you are working in, you can execute:
import os
print(os.getcwd())
to get the current working directory.
Note that python will not reload a modified file unless you tell it to. If you edit mymodule.py, then to see those changes take effect you need to do:
from importlib import reload
reload(mymodule)
I often put a print statement in the module, like:
print('try number 3')
to make sure I’m getting the fresh version, and not a cached version.
Importing vs. running a module
It’s common practice to include executable code in a python file that contains functions, so that the functions can be tested or run to show how they work. To support this, python uses the “__name__ == “__main__” trick:
def fun1(alpha):
    return 2*alpha

if __name__ == "__main__":
    myvar=2
    print(fun1(myvar))
If you write a file called mymoodule.py containing these lines, you should find that when you import it from another module:
from mymodule import fun1
nothing will print. This is because the variable __name__ is set to “mymodule”.
If instead you run the function from python:
python mymodule.py
you will get a printed result, because now __name__ is set to “__main__”.
Demonstration code
- using the new scipy initial value problem solver: scipy_integrate.ipynb
- debugging lab5_funs.py with pdb.set_trace()
- Using multiple cores with joblib_example.ipynb
- Multicore data processing with zarr and dask
5) Introduction to pandas extracted from Research computing in the Earth Sciences
- Confused about ANOVA, T-tests and chi-squared statistics? Check out Statistical rethinking with R-code ported to python at the Statistical rethinking github account
- An excellent course in computational statistics with this github repository
- Slightly out of date guide to parallel python
- numba_demo notebook
Background links
- cpu clock speed progress has stalled
- multiple cores are getting cheaper
- HPC is dying, and MPI is killing it
- C++ HPX
- Threads vs. processes
Dan’s suggestions
- Saving model data in a convenient format to be post-processed later, e.g., hdf5, pkl, vtk or another binary format and using xarray or pandas or something to deal with the data effectively. Slicing multidimensional data.
- A skeleton of the most basic model using classes, with classes like “solver” “timestepping”, “grid?” … We sort of already have this in the daisyworld lab and other places.
- speeding up code, starting from the slowest to the fastest, some examples of how to get faster results, with examples like, a nested for loops and lists, to faster operations using numpy library, to fast operations on one processor achieving near C speed through some mechanism, to using mpi4py to run code on multiple processors. Guidance on when each method is worthwhile and when it’s a waste of time.
Books and tutorials
If you are new to python, I would recommend you go over the following ebook in detail:
Jake Vanderplas’ Whirlwind tour of Python is available both as a set of notebooks which you can clone from github or as a free ebook: http://www.oreilly.com/programming/free/a-whirlwind-tour-of-python.csp
to get the notebooks do:
We will be referencing chapters from:
A Springer ebook from the UBC library: Numerical Python
with code on github:
git clone https://github.com/jrjohansson/numerical-python-book-code
Two other texts that are available as a set of notebooks you can clone with git:
Our version of David Pine’s Introduction to Python: http://clouds.eos.ubc.ca/~phil/djpine_python/
My favorite O’Reilly book is:
Some other resources:
- If you know Matlab, there is Numpy for Maltab users
- Here is a python translation by Don MacMillen of Chapter 1 of his matlab guide
- Python data structure cheat sheet
- Numpy beginners guide
- Learning Ipython
- The official Python tutorial
- Numpy cookbook
- A general computing introduction: How to think like a computer scientist with an interactive version
- Think Stats
- Think Bayes